Spices have been the driving force behind much of Western civilization. Before the collapse of the Mongol Empire in 1368, overland routes transported spices to Europe. The loss of these routes drove the European exploratory voyages around Africa and across the Atlantic ocean. The common myth about spices being necessary to make bad meat edible is untrue – people in the middle ages wanted spices for the same reasons we do today.
As with so much else, today we live in an age of excess. Every spice sought after by Vasco da Gama is available in a supermarket at a fraction of the cost. Many a kitchen cabinet has been sacrificed to a profusion of little bottles with shaker tops, often purchased for a single dish and never used again. So a method of organizing these spices now becomes a valuable commodity.
Why buy when you can make?
I decided making spice racks for my kitchen would be a relatively fast project. My kitchen cabinet doors are narrow, so most racks wouldn’t fit. I chose wire as the material because it goes with the steel cabinets and doesn’t block the labels on the bottles like a continuous piece of sheet metal would. But I wanted to make the backs out of sheet metal so I could stick them to my cabinet doors with double-sided tape.
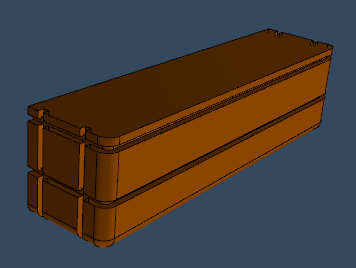
I measured the cabinet doors, choosing a width of 8” and a depth and height of 2” for the spice racks. A typical spice bottle is 1.75” in diameter so that gives me enough space for the thickness of the wire and clearance to slide the bottle in and out. Here is a 3D model of the spice rack (click to rotate and zoom):

As a first step in actually making it I made a wooden form for bending the wire. I made the form out of glued 2x4s, cut it to size, and rounded the edges with a ¼” round router bit. Then I used a pull saw and a 1/8” chisel to cut slots for the wire. I probably could have used a router bit for the slots but I wanted to finally use my 1/8” chisel. The form also helped me confirm that I liked the size and shape of the rack.
Here’s a 3D model of the form:
And here are some photos of making the form:


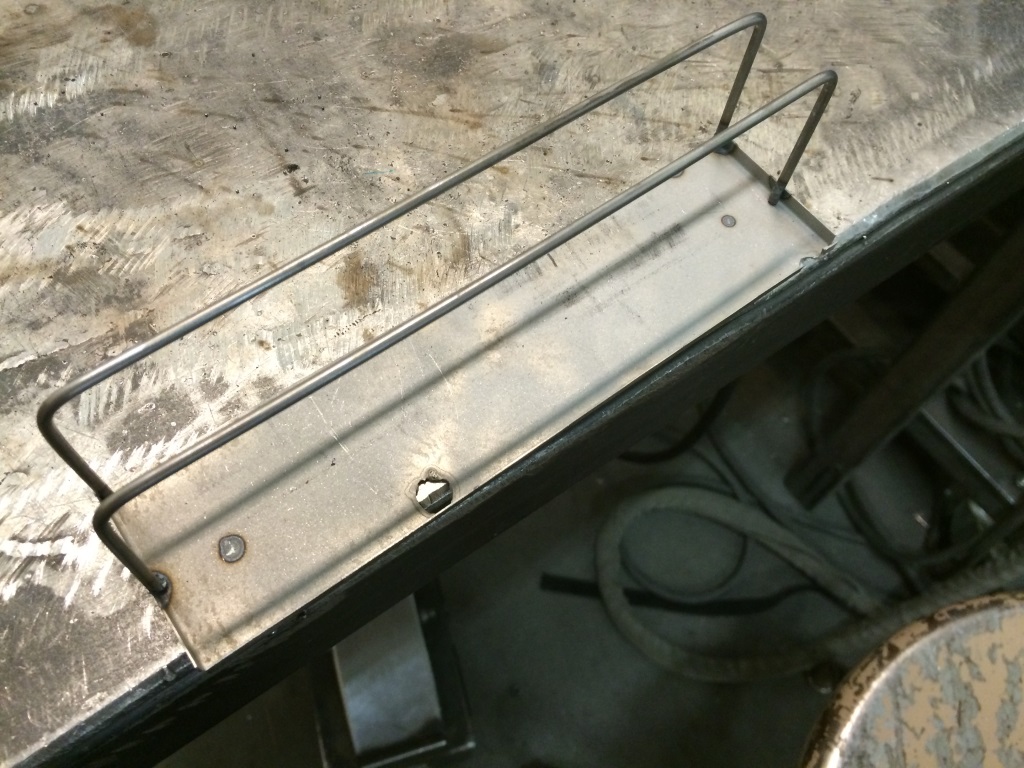
After this the next step was to make the backs, which was easy using the shear and metal brake at Artisan’s Asylum. We don’t have a notcher, though, so I used a Dremel to cut out the corners of the panels. The sheet I used had holes in it from before, and had a fair amount of rust so I sandblasted and sanded the pieces.

I then bent the wires as needed. I laid them in the slots of the form and bent them around the corners. The only trick to this is to clamp a wood block just behind the bend to keep the bend confined where you want it. The vertical pieces had to be longer to fit around the horizontal ones. I just put a spacer against the form to get the right amount of clearance.
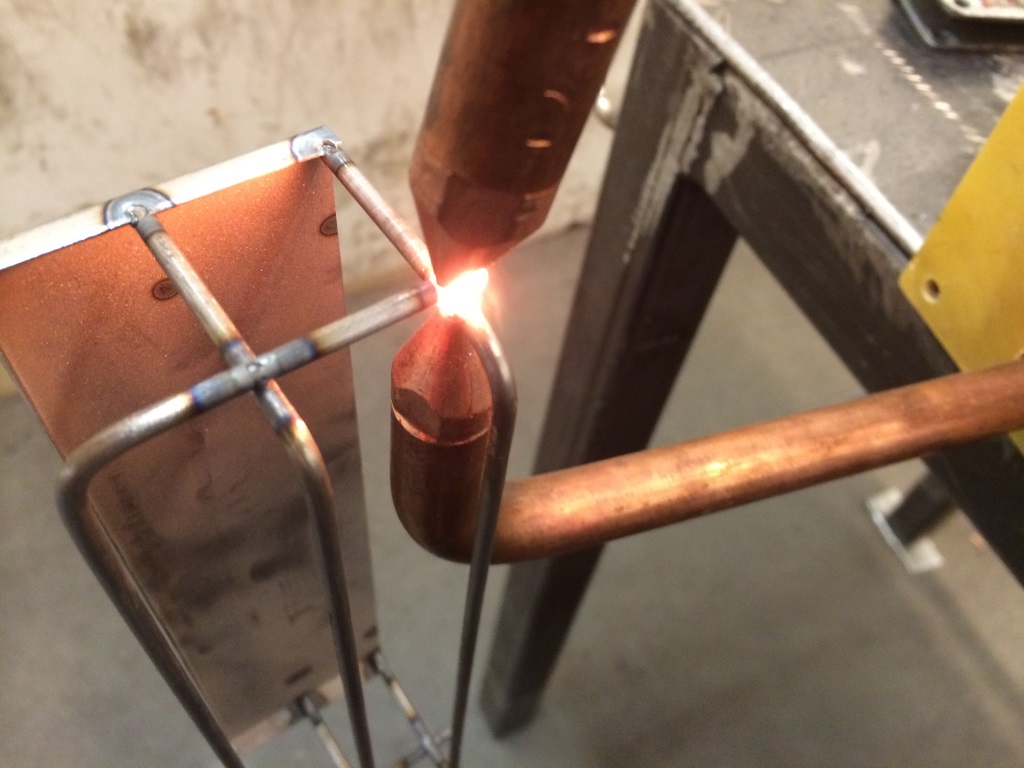
Then it was time to spot-weld the wires to the backs and to each other. Here I wished I had made my form such that it could keep the pieces aligned while I was welding. I just aligned the pieces by hand and used small c-clamps to hold them.

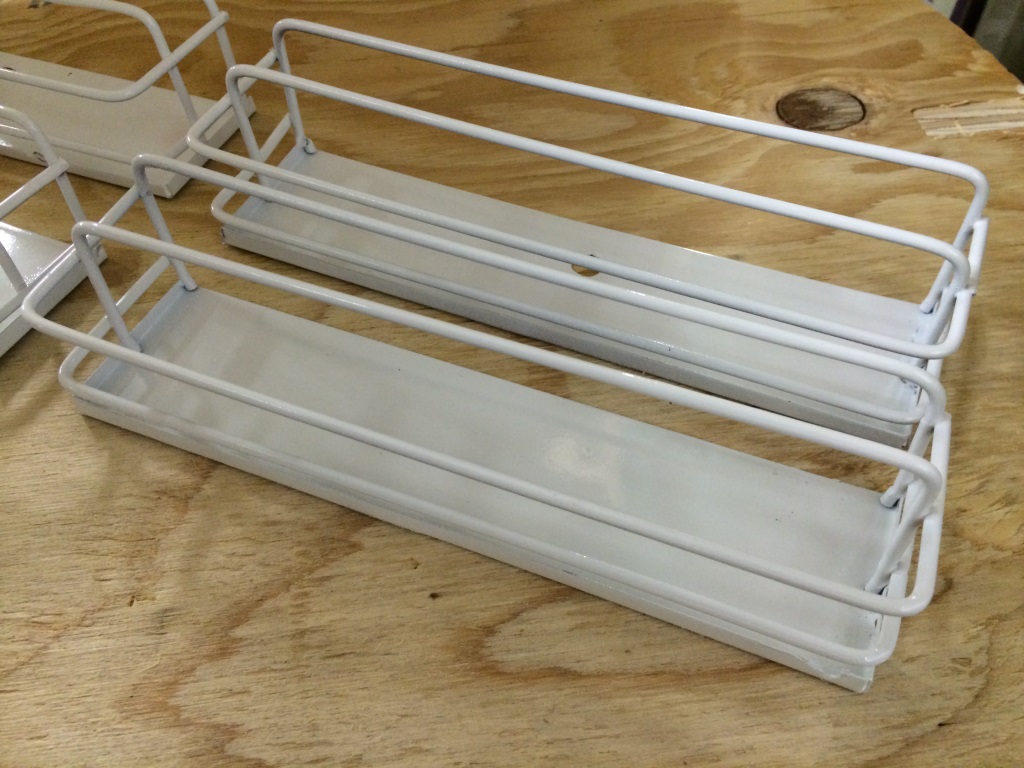
Lastly, I ground the joints flush, primed and painted the spice racks, and installed them in my cabinet. Now, I can reach my spices with ease.