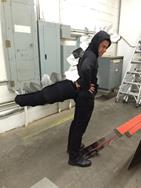
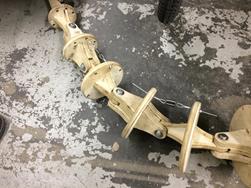
This year for halloween, I wanted to be a Stegosaurus – a serious, adult dinosaur. The main reason for my choice was the success of last year’s owl costume, about which more another time. I wanted a costume for which I could use textured metal plates like I used for the owl feathers. This time the plates would be the back plates of the stegosaurus. The other reason for my choice was that I’ve always wanted to try making an articulated tail. This was my chance.
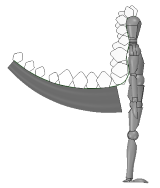
My first step was to scale some stegosaurus images found on the internet over a human figure in SpaceClaim to get the proportions for the plates and tail. I decided to use two sizes of plates rather than a gradual progression so I would only have to make two patterns. This led me to an arrangement something like this:
There would be three components to this project: the tail, the back plates, and the fabric part of the costume.
The tail
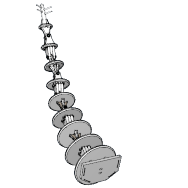
Now that I had the basic dimensions for the tail, I set up a SolidWorks model. There are numerous ways of doing top-down design in SolidWorks but I went with making a set of constrained sketches in a single part, extruding everything, and then doing a split body operation to export the resulting pieces into separate parts which I could then assemble in a separate assembly file. Here is a 3D model of the tail (click to rotate and zoom):
You can also download the model as a STEP file.
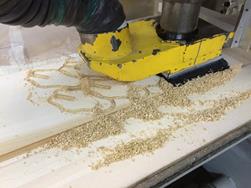
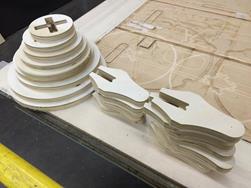
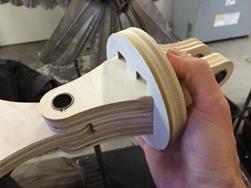
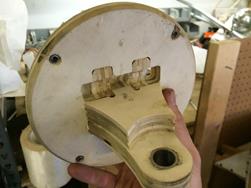
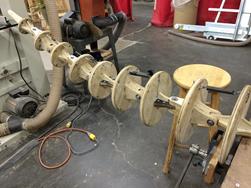
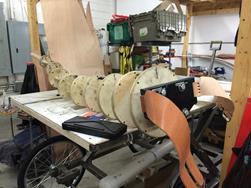
I picked plywood as the material for the vertebrae. I happened to have a few sheets of ¾” thickness that would be enough for the project. The plan was to cut the parts on the MultiCAM and by judiciously adding metal reinforcements I could make a robust movable structure with minimum effort. Instead of using spherical joints between the vertebrae I went with alternating perpendicular hinges. That seemed more appropriate given the construction material and I hoped it would save me from buying a lot of expensive hardware. After cutting on the CNC, I rounded the edges with a router and drilled the holes to size.
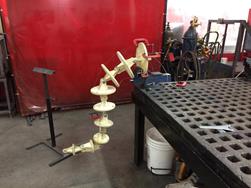
I was planning to actuate the tail using four cables, and so I drilled holes around the perimeter of the discs and glued pieces of steel tube to act as guides for the cable and keep it from sawing through the plywood. I quickly discovered the issues with this approach when I tried using a few test pieces of cable to move the tail. Pulling on the cables would cause the cable to buckle rather than curve steadily in the direction of the pull.
Someone recommended I try using springs to pretension the tail. This sounded like a good idea, and I figured I could use springs to keep the tail straight vertically as a bare minimum. I calculated the moment at each horizontal hinge and ordered springs accordingly. After I installed these, the tail stuck out horizontally and had a nice bounce – however disaster struck quickly when the first two vertical hinges failed.
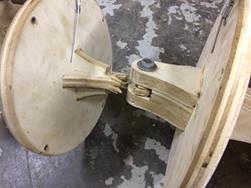
I had not anticipated this failure mode because I was planning to use cables to transmit all the stress back to the start of the tail. Like in a spinal column the load on the hinges was supposed to be purely compressive. But with this new design using springs only at the horizontal hinges, all the weight of the tail (10+ lbs.) was on a single ¾” piece of plywood which quickly broke.
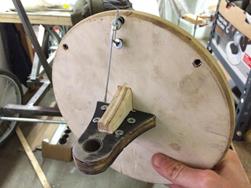
I was kicking myself for my stupidity but came up with a plan. I cut out the broken piece and replaced it with a sandwich with plywood in the middle and steel plates on the outside. The bushing fit tightly into the steel and everything got be epoxied together. I cut the steel on our CNC plasma cutter out of 14 gauge sheet, then ground it to give the epoxy something to grip and epoxied and screwed everything together. I wasn’t quite sure that it would work, but it has endured to this day which I’m pretty satisfied with.
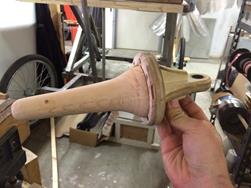
I also turned a tip for the tail on our wood lathe – the great thing about the Asylum is that we have every tool under one roof. I originally wanted to make a thagomizer as shown in the 3D model above, but ran out of time.
To mount the tail to myself I made a belt out of leather, sort of like a weightlifting belt, and riveted it to the tail. All parts purchased from Tandy Leather. In my original design, this belt would have been painted black with the tail controls on it, and also dinosaur engravings – but as it was I was making the belt at midnight the day before Halloween, so these things would have to wait.
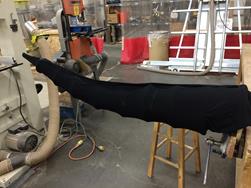
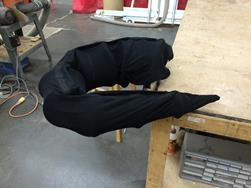
At this point I had run out of time to build in some kind of controls to the tail, so I just left it to swing under its own weight. This turned out to work quite well, as I could lean forward and cause the tail to curve in on itself, so I could catch the end and hold on to it to keep it from causing trouble.
Back Plates
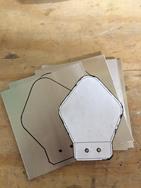
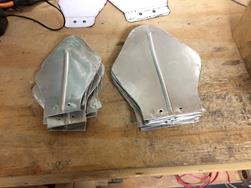
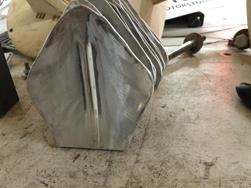
This part of the project was fairly straightforward after last year’s experience. I used what was left of my 0.19” aluminum sheet from Home Depot. I made a paper template for the large and small fins, traced them onto the sheet, then cut the pieces out with my Harbor Freight Electric Sheet Metal Shear. I folded over the edges and made a central spine with my Harbor Freight Bead Roller. I bought these two tools for the owl costume and they are not the greatest but they’re ok for thin aluminum. Finally I gave the plates some texture using an angle grinder with a flap disc. I then riveted the plates to pieces of black nylon webbing to be joined with the rest of the costume.
Fabric
This was the shortest part of the project since alas the fabric that I ordered (imitation snakeskin) never showed up. For the tail I used some leftover black lycra and stitched it right to the webbing. For the body part of the costume I sewed the webbing with the plates to a black hoodie that I had.
Clearly there’s much work to be done in developing this idea further, but I’m pretty happy with what I was able to accomplish in time for Halloween.
